Showing posts with label Tutorials. Show all posts

Tuesday, October 1, 2013

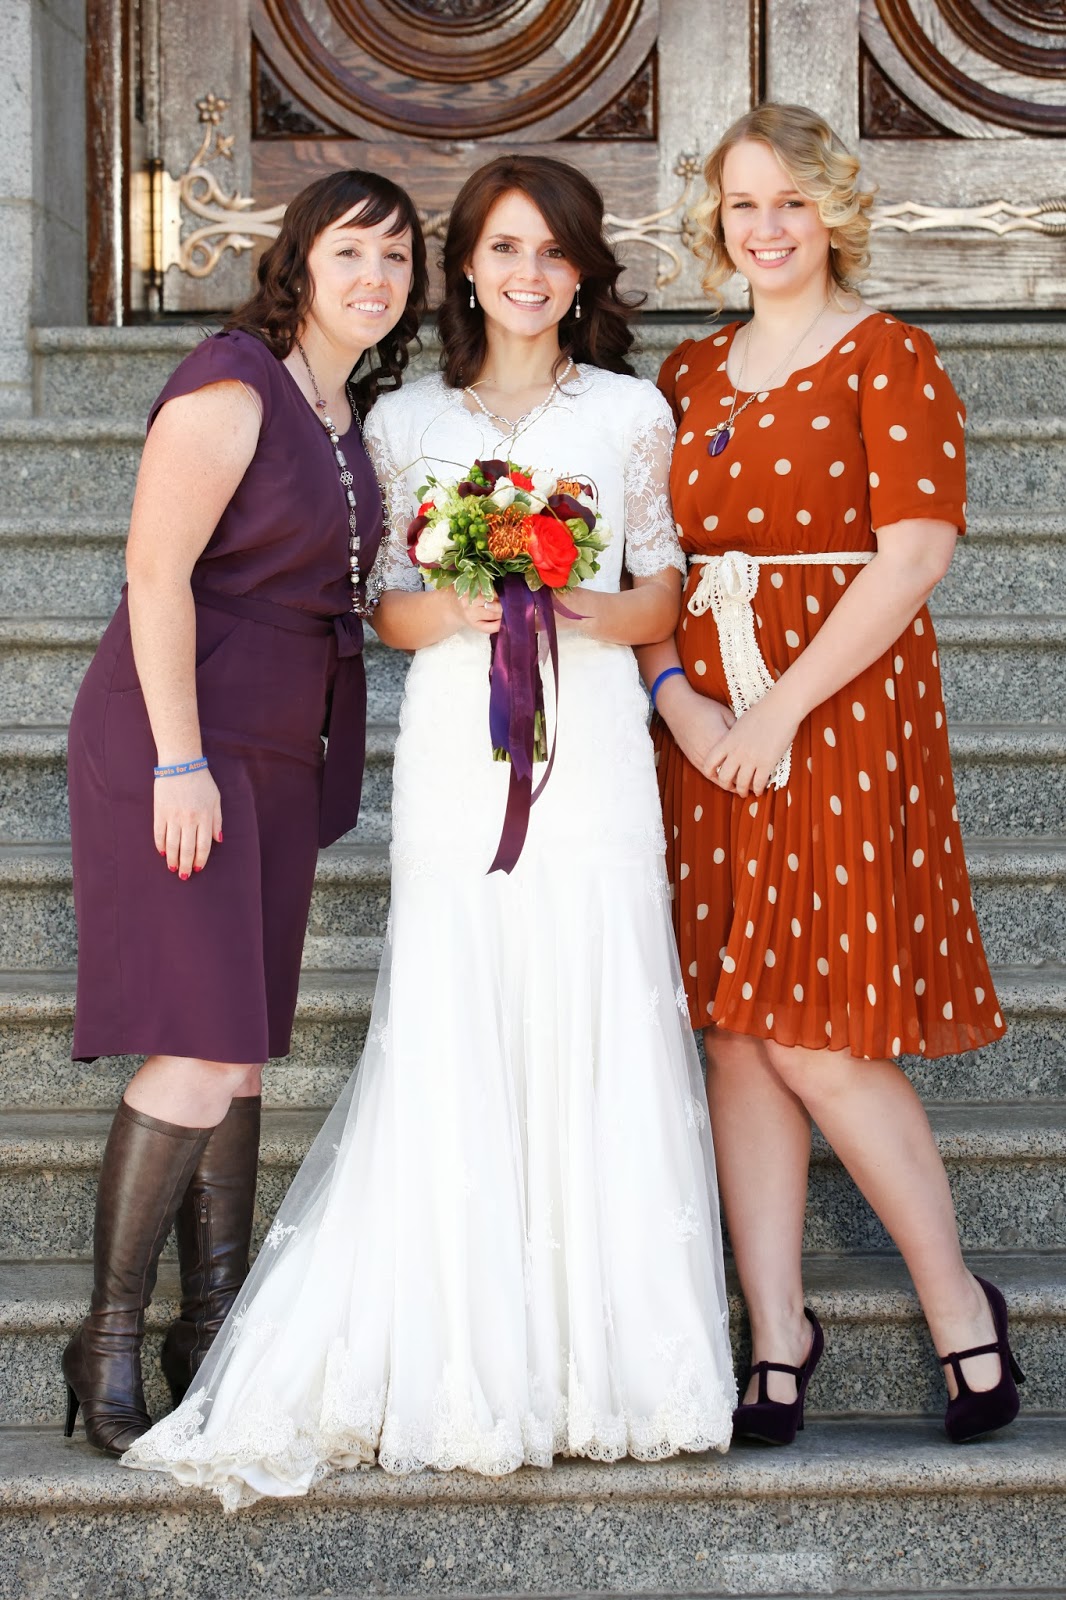
Wedding Series: Country Chic October Wedding

It's October which means it is time for our Fall Wedding Series blog post. I loved my wedding last year and wanted to share it with you.

Theme: Country Chic
Photographer: Matt McFarland
Ceremony Location: Salt Lake City Temple
Dress: Borrowed it from my friend Jenny Herrin who had it custom made at a lace shop(this is a great way to save money...borrow your gown)
Hair & Makeup: Charelle Broadhead (she is absolutely amazing and is located in the Lehi area)
Flowers: Janae Frazer 
Colors: Dark Purple, Orange, and a hint of green
Jewelry: Also borrowed from my friend Jenny Herrin
Hair Piece: Made by Jenny Herrin 
{Note: Jenny now is the business owner of 'Crown your Gown' She can help you out with hair pieces, etc}

I wanted a gorgeous wedding that didn't hurt my budget too much.  

Here is what we did to lower the costs:
  • Get crafty!  If you have the time start making your own centerpieces, invitations, etc.  This will help save you so much in the long run.
  • Use your connections!  We knew our photographer, florist, caterer, hair stylist, cake maker, etc, etc, etc.  They gave us great deals which helped save us a pretty penny.
  • Get a vision of what you want.  Write down your ideas.  Sketch out your plan.  This all helped me so much.
  • Though we used a caterer to provide a few of the food items I used local bakeries to save on cost.  My caterer served the items I had bought from local bakeries for a small fee.
  • Sister-in-law made our cake as our wedding gift(you can't get any better than free).
  • I borrowed my wedding dress(again free is so nice).
WEDDING CEREMONY
{note: reception details provided below}


RECEPTION
Venue: Draper City Barn (Total cost $100)
Catering: Sweet Pea Catering 
Cake: Made by my amazing sister-in-law Sarah LeFevre
Flowers: Janae Frazer
"Thank you" favor: Caramels made by "the little red hen"(amazing & come in so many flavors)
Decorations: All of the centerpieces, backdrops, and all the fine details were put together by my amazing family and myself! Candlesticks,lanterns, etc were purchased at Hobby Lobby and Tai Pan.
Hair Piece: Made by 'Crown your Gown'


We had guests write us little notes on these cards and use small clothes pins to pin them to twine
We put fires outside for warmth and smores 
Our first dance: Sung by Heather Jackman

Happy October Weddings!

Tuesday, September 17, 2013

Tutorial Tuesday: Makeup Bag for Less!!

I love Sephora but my wallet and my husband don't share that same enthusiasm.  I get amazing products there every time but it was getting hard giving up a Benjamin Franklin every time I left the store.  So I started to embark on a journey to find "cheaper" products in price but no quality.

Have I told you all about my love for the blog Masckara?! If you haven't heard about it yet then check it out here!  Amazing makeup tips, tricks, and yes "cheaper" makeup options that work just as well as any of the expensive stuff!
 
Here are some of the products that I have tried, love, and swear by!! You can find them at your local Target or Drug Store! 
 
1. Maybelline Dream Lumi Highlighting Concealer in Ivory or buff(depending on how tan I am)
2. St. Ives Timeless Skin Collagen Elastin Moisturizer(my favorite moisturizer)
3. Revlon Colorstay Makeup Oily/Combination(mix this with the St. Ives moisturizer to make a tinted moisturizer)
4. L'Oreal Voluminous Mascara in Carbon Black
 
I'll be adding more favorites to this list as I try more and more of the products the Masckara blog recommends.  In the mean time try them out for yourself and give me your opinion on them:)
 
Live Happy! 


Tuesday, September 10, 2013

Tuesday Tutorial: How to Budget

I have literally 3 minutes to get this tutorial posted on Tuesday! So here it is! A 'how to' budgeting guide brought to you by Dave Ramsey! 

My husband and I use this template to create weekly budgets.  

I, like most women, enjoy a sense of security. When I know where my money is going and how much I have to spend I feel much more secure.

Click on the link below to download/print Dave Ramsey's PDF!

Happy Budgeting:)

Tuesday, September 3, 2013

Tutorial Tuesday: DIY TONER

I'm bringing you another tutorial from the oh so AMAZING Maskcara blog...found Here!
 
a DIY toner for your hair!  Have you ever gotten your hair done {or do it yourself} only to find it looks a tad bit brassy?!  I have!!!  Well now we have a secret weapon{thanks to the Maskcara blog}.
 
The Toning Vinegar rinse
Recipe:
2 Cups Vinegar
1/4 teaspoon Purple Food Coloring (I use a neon version cause I want it to be vibrant)
*Or if you are a redhead and want to bring the punch back into your color use red food coloring!
Directions:
Before using the rinse test it on a small piece of hair and adjust the amount of food coloring depending on how it looks on the strand If you have more brassiness you may need more color or vise versa.
After your conditioning take your rinse and poor it down your hair. Massage it in to evenly distribute. Rinse with water. (While your hair is still wet it might smell a bit like vinegar but once it dries the scent totally disappears)

Tuesday, August 20, 2013

Tutorial Tuesday-How to run a marathon in 16 weeks

I started running 3 years ago and have become completely addicted.  I ran my very first half marathon last April and am debating running a full marathon.  I'll keep you posted if this idea blossoms info a full blown desire to complete 26.2 miles.  Anyway, running has become my addiction but it has also started to burn me out.  I started reading the book Run Less, Run Faster.  They have this amazing program where you only run 3 times a week...HARD...and you cross train 2 times per week...HARD.  This training program is supposed to keep runners from getting burnt out, to prevent less injuries, and to make you FASTER as a runner!  Brilliant!  I completed my first speed workout last night!  I was sweating like crazy and it was tough but I completed it.  My goal is to complete this entire training program over the next 16 weeks.  I'll keep you posted.

Run Happy!


Tuesday, August 13, 2013

Tutorial Tuesday-Blended Eyeliner

Todays tutorial Tuesday is brought to you by Maskcara.com! I tried this little trick this last week and loved it! It's quick and easy(my favorite) and looks fabulous(bonus)! Blended eyeliner is great for everyday and can easily be made into a smokey eye.
Watch video here: http://www.maskcara.com/maskcara/2013/05/21/blend-it-baby/

Tuesday, August 6, 2013

Tuesday Tutorial: Boho Beach Theme Baby Shower

I have gotten a few requests to do a tutorial on the 'Boho Beached themed Baby Shower' I threw over the weekend. The shower turned out exactly how I envisioned it and I hope you enjoy it as well!

Here is the formula I use when planning an event(I'll use the baby shower as an example):
1. Pick a theme&determine guest list: Beach Boho Baby Shower(chosen by the mother to be) 
Formal brunch with friends&family of the mother-to-be
2. Choose a date and time for the event:  August 3,2013 11-1PM
3. Location: Backyard Pergola
4. Menu: Brunch
-Buttermilk Waffles with an assortment of syrups
-Assorted Muffins
-Egg Baskets(hash browns, eggs, and bacon baked in muffin tins)
-Fruit Kababs
-Yogurt Parfaits
-Crispy Bacon
-Mint Lemonade
-Lemon&Lime Water
-Orange Juice
5. Colors: Pink, White, Green, Blue
6. Decor:
-Fresh Flowers
-Lanterns
-Candles
-Sea Shells
-Chevron Print Table Runners
-"Rag" Banner & Burlap Name Banner
7. Draw a setup:  I sketch where I am going to place my food tables, seating tables, decor, etc.  This way I have a mental image of where everything is going before hand so I'm not running around the day of wasting time or figuring out that a certain table can't go a certain place.
8. Entertainment: I'm not a huge fan of baby shower games so instead I designed and printed up a "Baby Shower Advice & Wishes Card" that guests filled out for the mother-to-be!  It was fun and it's something Ashley(mom-to-be) will enjoy!
9. Invitations: I like to send invites 4 weeks before an event to give guests ample notice but not to far in advance that they forget.
10. Prep work, Prep work, Prep work!  
Even if you are a few weeks or months out from the date of the event I promise doing a little prep work during this time will make your life much less hectic in the final weeks, days, and even hours leading up to your event!
Here are some things I did to get ready:
-Made Banners(these take more time than you think)
-Bought utensils, plates, straws, etc.
-Designed and Printed all Printables
-Bought Decor including seashells&starfish
-Made arrangements for borrowed tables, chairs, linens, & extra serving-ware

Here is what I did the night before:
-Picked up tables, chairs, linens, & extra serving-ware
-Bought food(as most of my food items were perishable I wanted them to be as fresh as possible)
-Bought fresh flowers(store these in your fridge over night&DO NOT cut the stems off...this keeps them fresher longer)
-Made the muffins the night before(store in an airtight container)
-Mixed and stored the waffle batter in the fridge
-Transferred all syrups to the serving ware I would use the next day

Day of Breakdown:
9:00 AM: Start food prep
 -Fruit Kababs(stored in fridge)
-Yogurt Parfait(stored in fridge; leave off berries until the very last)
-Baked Egg Catchers
-Warmed up waffle maker(I love fresh waffles so I make these very last)
10:00 AM: Setup
-Setup Tables & Chairs
-Laid linens & table runners
-Hung Banners
-Add Decor
-Situated Serving-ware
10:45 AM: Finishing Touches
-Cut flowers and added them to mason jars
-Started Making Waffles
-Mixed Drinks and add ice(especially for outdoor events)
-Bring out food

ONE ADDITIONAL NOTE: When I put together a food table I like 'levels'! I have a variety of serving trays all at varying heights to give a table depth.

We added the last tray of food to our table just as the first guests arrived!  Of course somethings will always go wrong when you are hosting an event, but that is to be expected.  Just learn to roll with it or you will be so stressed by the time the event comes around you won't even be able to enjoy it.
ALWAYS REMEMBER:  What matters most about any event are the people!

I've included some pictures of the event for you to and enjoy and I hope this tutorial was helpful.
If you have any questions leave a comment below.

Happy Hosting!